

Screenshots
nextcapture offers a very clearly structured user interface. Only a few elements are necessary to control the application
- Two ribbons for the scan task

The start ribbon contains all menu entries for the main scan task.
- The “Start” group / button to begin a batch
- The “Scan” group offers all actions for scanning control including insert scan, replace scan and delete pages, sheets or documents.
- The “Save” group offers different actions to stop batch processing. “Stop” interrupts the work on a batch, it can be continued later. “Finalize” is used to release the batch at the end of the work on it. Files then are stored to their final destination. “Purge” drops the current batch and deletes the temporary files.

When scanning is done there may be the need to work on the documents and/or the pages.
The document ribbon offers the action to rotate, invert, deskew the images, connect or split documents and delete pages, paper sheets or whole documents.
Additionally there are possibilities to mark pages.
- A red mark means that the page will be deleted automatically when the batch is finalized.
- A green mark is an optical marking to recover the image
- A blue mark should be set if you want to prevent the system from finalizing. It will not be possible to finalize a batch if there is any blue mark in it.
- One ribbon to change settings

- The first group is used to specify the image source. nexctcapture manages two subprofiles for different scanners. With this the customer is able to set up a configuration which can use a document scanner and a flatbed scanner within the same profile. The user can switch seamless between these two scanner settings. Images can also be read from disk.
- “Image selection” is used to select teh preferred image in case of dualstream scanning. For example if bitonal is selected, both images are scanned and temporary stored but only the bitonal image is displayed. In some cases the user may want to keep the color image instead of the bitonal image. For each page the user can change manually to the desired image, color or bitonal. Only the displayed images will be stored permanently when finalizing the batch.
- The “Doc separation” group offers controls to set up the document separation. If a user is not familiar with barcodes or patchcodes he can use the DPU code. In the dropdown menu the entry “print” opens a PDF file with the registered application. It contains a separation sheet which is hereinafter reffered to as DPUcode. It can be printed and separates documents if the separation is set to “DPUcode”. Of course the customer has the possibilities to separate by patch or barcode when selecting the meniue entries.
- “Image correction” offers punch hole removement and auto rotation of images.
- “Empty pages” and separation sheets can be marked for deletion when activating the menu entries in the “Delete” group.
- The group “Target image” allows the setup for path and filename anf the choice between TIF or PDF as the target file format.
- A default batch file can be created by selecting the last menu entry
- One menu page for profile management
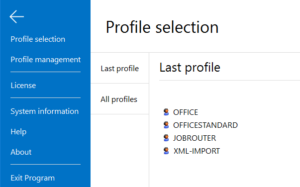
This menu page offers the profile and system management. Profile management includes “copy profile”, “save to disk” and “load from disk” actions.